#craft beer #app #product

07. Okt. 2019 |
- min Lesezeit
Obviously, we wanted our fitness app “LazyAss” to run on Android and iOS. Since we love developing with React in general, we wanted to give React Native a try. You can find more information on that in our blog article React Native: The good, the bad & the ugly. LazyAss focuses on motivating our users to go running, so we created a ranking where everybody could take part in a weekly challenge. The users are ranked by the walking and running distance they’ve covered over the week. To get that data, we decided to read the metrics from either Apple HealthKit (iOS) or GoogleFit (Android). In order to have a ranking that is (close to) real time, we additionally built background services for iOS and Android (written in native code) that check for new health data every 15 minutes.

LazyAss Users are ranked by their walking and running distance covered over the week.
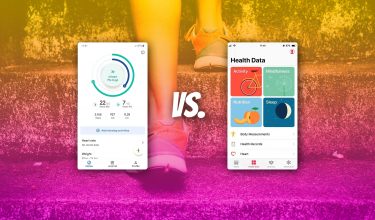
Both apps aggregate all fitness-related data from fitness apps like Strava, Runtastic etc. Also, the device’s built-in sensors (accelerometer, GPS etc.) write data like step count and distance into those Health Apps. Also data from external devices like the Apple watch or other bluetooth devices are aggregated here. Manual entries are also possible if you don’t have a fitness tracker or you accidentally left your smartphone at home running that Marathon. But of course there are also some differences between Apple HealthKit and GoogleFit: HealthKit is preinstalled and integrated into iOS to give Apple Users a full view on their Health State. So while HealthKit shows you all workout related data, it can also handle sleep data as well as data concerning nutrition, mindfulness and much more (see the full list here). Some of those features are especially interesting for users with medical conditions or allergies. GoogleFit on the other hand has to be manually installed since it doesn’t come preinstalled with the software. It specifically targets people who want to become or stay fit, so it mainly focuses on workout metrics and overall movement during the day. Users can see their “heart points” as a metric for their overall health.
When it comes to technical differences, we have to take a look at how both apps can be accessed.
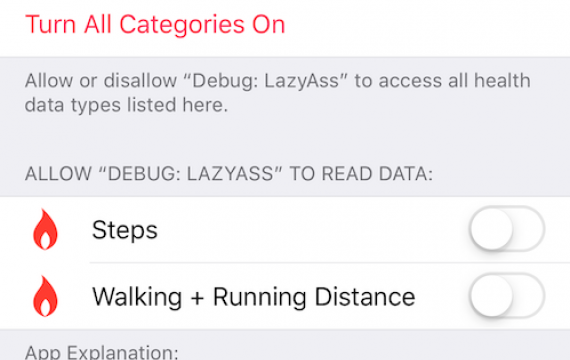
HealthKit settings are only accessible via the phone’s settings. There, the user has to give consent that certain apps are allowed to read/write data into HealthKit. So after installing and registering for LazyAss, the user is asked to allow us to read the walking and running distance from their HealthKit. To set up permissions, we use “rn-apple-healthhit”, a React Native package for interacting with Apple HealthKit.
in order to initHealthKit we need to specify an options object with the relevant HealthKit permission settings:
let options = {
    permissions: {
        read: ["Height", "Weight", "StepCount", "DateOfBirth", "BodyMassIndex", "ActiveEnergyBurned"],
        write: ["Height", "Weight", "StepCount", "BodyMassIndex", "Biotin", "Caffeine", "Calcium", "Carbohydrates", "Chloride", "Cholesterol", "Copper", "EnergyConsumed", "FatMonounsaturated", "FatPolyunsaturated", "FatSaturated", "FatTotal", "Fiber", "Folate", "Iodine", "Iron", "Magnesium", "Manganese", "Molybdenum", "Niacin", "PantothenicAcid", "Phosphorus", "Potassium", "Protein", "Riboflavin", "Selenium", "Sodium", "Sugar", "Thiamin", "VitaminA", "VitaminB12", "VitaminB6", "VitaminC", "VitaminD", "VitaminE", "VitaminK", "Zinc", "Water"]
    }
};

One very important thing to keep in mind is that even after the user has agreed to share the data with us, there is a security mechanism which allows us to only read the HealthKit data when the iPhone is unlocked and LazyAss is opened in the background.
Since GoogleFit is not preinstalled on Android devices, we need to verify if the App is installed before our app can go any further. After the user installed the app, we can use the OAuth client for authenticating with their Google account.
After that, all GoogleFit data can be read from the phone. To do that, we use another React native Module called “react-native-google-fitness”. With that, you can query history data using the Builder-Pattern of DataReadRequest similar to how its done in Android natively:
const readRequest = new DataReadRequest.Builder()
    .aggregate_dataType(DataType.TYPE_STEP_COUNT_DELTA, DataType.AGGREGATE_STEP_COUNT_DELTA)
    .bucketByTime(1, TimeUnit.DAYS)
    .setTimeRange(startTime, endTime, TimeUnit.MILLISECONDS)
    .build();

const result = await Fitness.History.readData(readRequest);
While the iCloud Sync for AppleHealth is optional, all GoogleFit data is automatically synced to Google. The most important difference is that here, it doesn’t matter if the Smartphone is locked or not. Our background task can always access the GoogleFit data, whereas the AppleHealth data can only be read when the iPhone is unlocked.
In summary, you could say that Apple HealthKit is more privacy-friendly and GoogleFit is more developer-friendly. Accessing the data is about the same level of convenient when using the existing React Native modules. For writing Background-Tasks, we suggest you do that using native code, since the connection with React Native for that can be a big pain.
Show us your love and download LazyAss!
